Note from the future: This is an older how-to I’ve migrated from an old blog on how I provisioned valid SSL certificates on my internal homelab using ACME DNS challenge so that I didn’t have to open ports up to the internet for the usual HTTP challenge.
It may be useful for those that haven’t got valid TLS/SSL/X509 certificates in the homelab yet. Some steps might be outdated.
The outcome of this write-up is to have all Docker-hosted services behind Caddy, using valid SSL certificates, without exposing any service to the internet.
Contents
- Pre-requisites
- DNS ACME challenge
- Managing your domain name with DigitalOcean and getting the API key
- Creating a wildcard DNS entry in dnsmasq
- Building Caddy with the DNS provider bundle
- Creating the Caddy docker-compose file
- Testing
- Adding real services
- Reloading Caddy and general administration
- Conclusion
Pre-requisites
- A purchased domain name.
- A DigitalOcean account (or any other DNS provider which Caddy supports for DNS ACME challenge). If you don’t have one already, please use my referral link to sign up to Digital Ocean.
- (Optional) dnsmasq server (or a PiHole server, which uses dnsmasq too)
- A Docker host with services ready to secure behind Caddy
DNS ACME challenge
Caddy uses public ACME CAs such as Let’s Encrypt or ZeroSSL to issue valid SSL certificates (as per their documentation).
With ACME (Automated Certificate Management Environment), there are several different ways a valid SSL certificate can be issued. When setting up a public-facing website this is fairly trivial as you can simply use the already-exposed port 80 to complete the HTTP challenge (or 443 for TLS-ALPN challenge) and get a certificate that way.
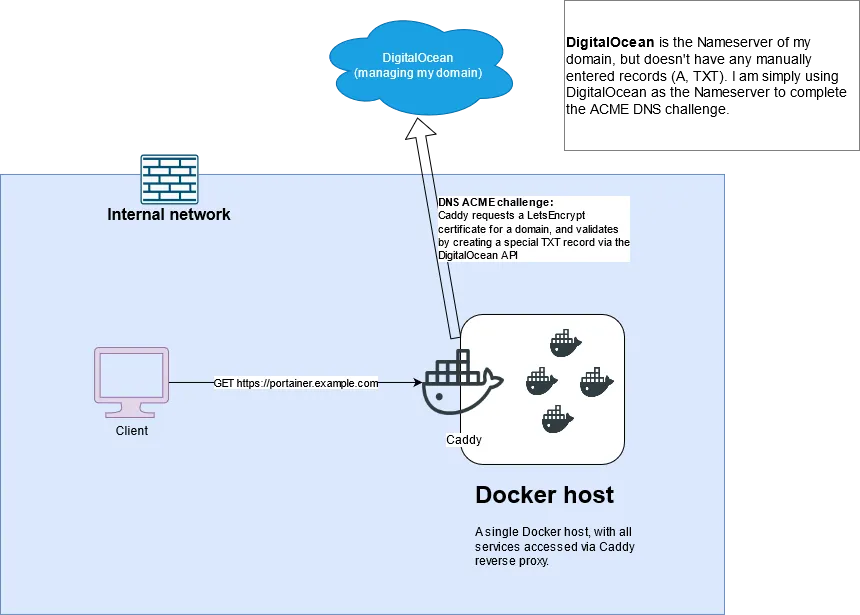
Since my services are never intended to be exposed externally (like you, if you’re reading this!), I opted for the DNS challenge. The only “exposed” service is my public DNS nameserver (DigitalOcean).
It’s possible to complete the DNS ACME challenge manually, but Caddy does all the work for you and renews certificates when they expire. Once Caddy is setup, certificates require little-to-no effort to maintain.
A picture tells a thousand words:
Managing your domain name with DigitalOcean and getting the API key
In order to complete the ACME DNS challenge, you need to give Caddy API access to your DNS provider.
I’ve used DigitalOcean for a VPS for quite some time, so using DigitalOcean to manage my DNS instead of any other Caddy-supported provider was a matter of convenience. I’ve included steps here on how to manage your domain with DigitalOcean.
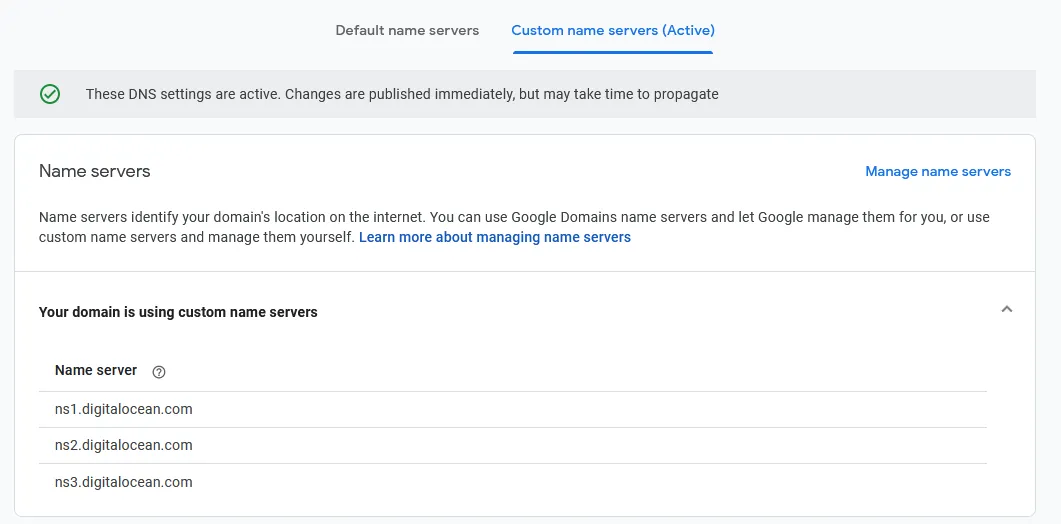
1. Set your nameserver to DigitalOcean’s
From your DNS provider’s management console, set your nameservers to DigitalOcean’s:
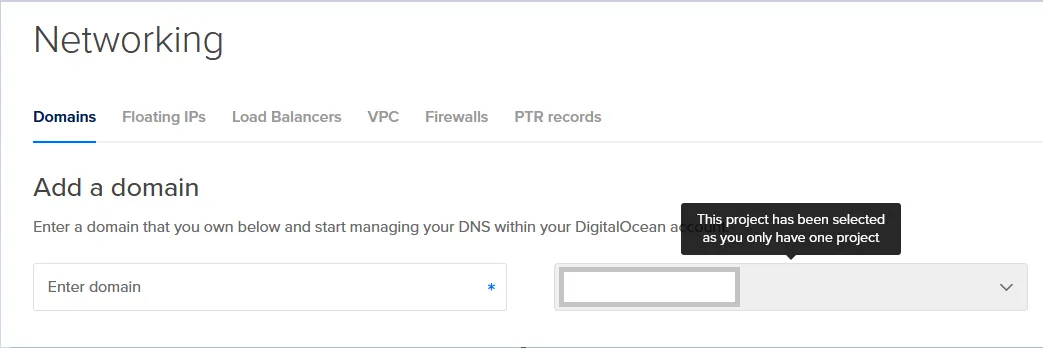
2. Add the Domain in DigitalOcean
On the Networking tab, add your domain
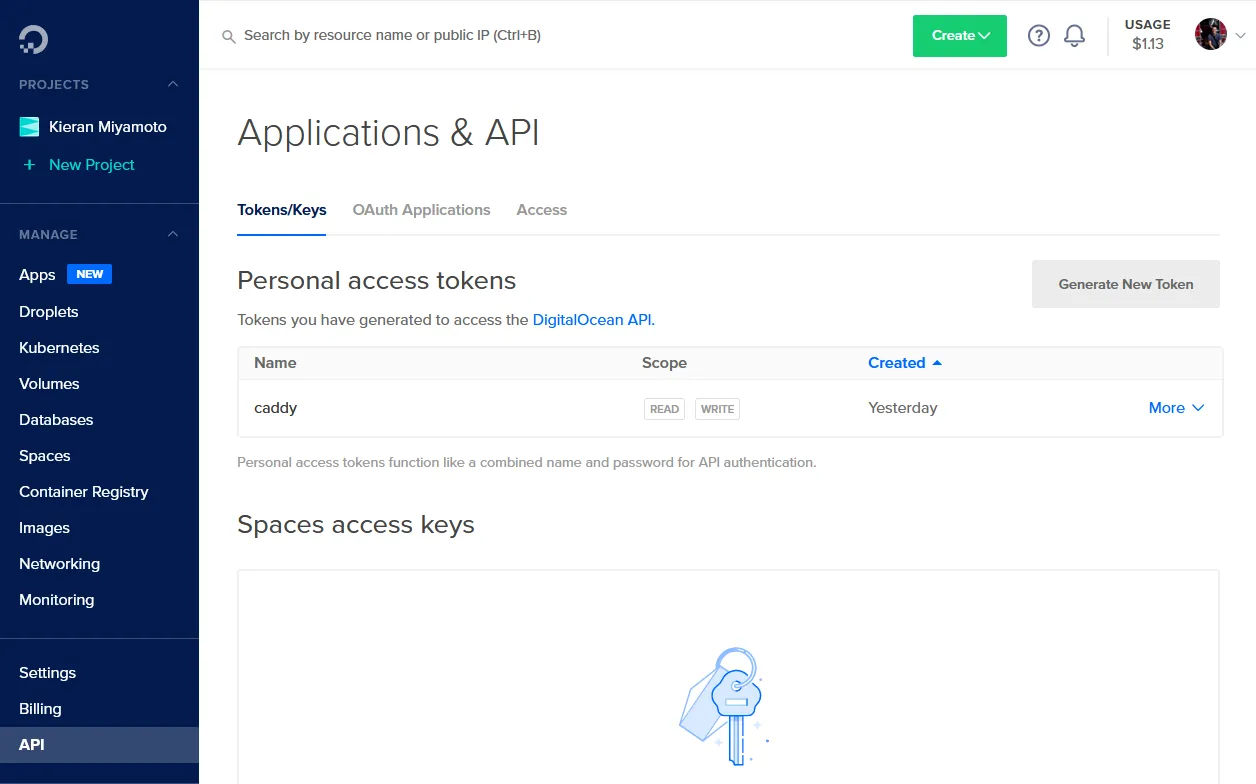
3. Generate the API key
Generate the API key from the API tab in DigitalOcean. Save it for later.
Creating a wildcard DNS entry in your local DNS server
I want each service to have its own subdomain. e.g.:
transmission.example.comportainer.example.comwiki-js.example.com
If you want to follow this example, you’ll either need to create individual A records/hosts entries for each subdomain, or you can create a wildcard DNS entry in dnsmasq and leave all headaches behind.
On my local PiHole, I just added a dnsmasq config file in /etc/dnsmasq.d/ for my wildcard domain to point to my Docker host. The syntax is address=/.domain.tld/10.10.1.250. My example below shows my personal config. Each service is underneath the lab.example.com domain. e.g. transmission.lab.example.com.
$ cat /etc/dnsmasq.d/99-dockerhost2.conf
address=/.lab.example.com/192.168.1.197
Building Caddy with the DNS provider bundle
I should preface that I opted to use Caddy in Docker. It comes as an official image. It’s usually plug-and-play, but since the DNS ACME bundles are not included by default, we need to build our own container image that we can then use for starting Caddy proper. Read the Docker Hub page from the section Adding custom Caddy modules for more information on what this means.
The following Dockerfile is a carbon copy from the Docker Hub page for Caddy, edited to specify the Caddy version and include the DigitalOcean bundle:
Dockerfile
FROM caddy:2-builder AS builder

RUN xcaddy build \
    --with github.com/caddy-dns/digitalocean

FROM caddy:2

COPY --from=builder /usr/bin/caddy /usr/bin/caddy
Save this Dockerfile to your Docker host, and simply run docker build -f ./Dockerfile -t "caddyacme" . from the directory.
This Dockerfile directs to build Caddy with the Digitalocean module and then copies the compiled Caddy binary from the builder image to a standard caddy image.
Once complete, I had 4 caddy images present:
- Standard Caddy2 image
- Standard Builder image
- The image where the modified Caddy image was compiled (tag-less, large)
- The slimmer Caddy2 image with the modified Caddy binary copied into it (tag-less, slim). :white_check_mark: This is the one we want to use for Caddy proper!
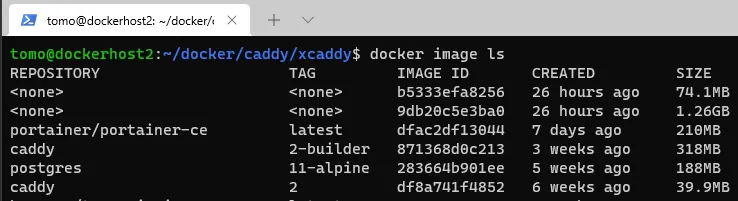
Once built, you can remove all images other than the slim modified Caddy image.
Creating the Caddy docker-compose file and dependencies
With the newly created Caddy image created, we can now setup the docker-compose file and dependencies.
I followed the instructions from Caddy’s documentation. Down to creating the site directory even though I don’t need it (yet!)
Directory structure
Create the needful:
$ mkdir caddy_config caddy_data site
$ touch Caddyfile
$ touch docker-compose.yml
$ docker volume create --name=caddy_data # creates the necessary caddy_data volume
$ docker network create lab-net-1 # creates a Docker network for all to-be-proxied Docker services. This is so that Caddy can address them by name within the Caddyfile.
Outcome:

(ignore the xcaddy directory, that’s where I held the build Dockerfile from the previous step)
docker-compose.yml
services:
  caddy:
    container_name: caddy-prod
    environment:
      - DO_API_KEY=YOUR-DIGITALOCEAN-API-KEY-HERE
    image: caddyacme
    restart: unless-stopped
    ports:
      - "80:80"
      - "443:443"
    volumes:
      - /home/tomo/docker/caddy/Caddyfile:/etc/caddy/Caddyfile
      - /home/tomo/docker/caddy/site:/srv
      - /home/tomo/docker/caddy/caddy_data:/data
      - /home/tomo/docker/caddy/caddy_config:/config
volumes:
  caddy_data:
    external: true
  caddy_config:
networks:
    default:
        external: true
        name: lab-net-1
To make this fit your environment:
- Use the image ID of the slim tag-less one that was built in the previous step :arrow_up:
- Add your DigitalOcean API key to the environment section
- Ensure the network is the same across your different Docker containers. This is so that Caddy can address them by name within the Caddyfile.
Adding your API key directly to the docker-compose.yml comes with risks. Anyone who can read the docker-compose.yml file can access your DigitalOcean account with the permissions provisioned by the key.
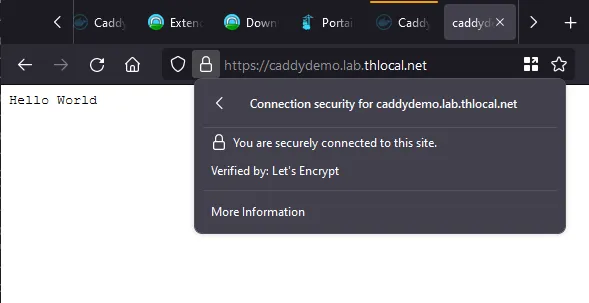
Setup a test service within the Caddyfile
caddydemo.lab.example.com {
        respond "Hello World"
        tls {
                dns digitalocean {env.DO_API_KEY}
        }
}
Testing
With your docker-compose.yml and Caddyfile modified to your environment, you’re ready to test your Caddy setup!
Simply run docker compose up from your project directory so you can stay attached to the logs in realtime. You should see something like tls.obtain and tls.issuance.acme.

Then, navigate to your test page and revel in the security!:
Adding real services
After a successful dry run, you can stop the realtime stream of logs with Ctrl + C and start adding real services to your Caddyfile. Since I created a dedicated network and ensured all my containers are on the same network, Caddy can address them by their container name:
portainer.lab.example.com {
        reverse_proxy portainer:9000
        tls {
                dns digitalocean {env.DO_API_KEY}
        }
}
Once you’ve added all your services, you can simply run docker compose up -d and your work here is done.
Reloading Caddy and general administration
When using a DNS wildcard in your local DNS server, the only administration required for onboarding a new service is modifying the Caddyfile and reloading Caddy.
The official Docker Hub page for Caddy has a useful way to reload caddy without having to stop/start the container:
caddy_container_id=$(docker ps | grep caddy | awk '{print $1;}')
docker exec -w /etc/caddy $caddy_container_id caddy reload
This process is simpler if you set a container_name like in my docker-compose.yml file above:
docker exec -w /etc/caddy caddy-prod caddy reloadCoincidentally, this is also the way to do general administration within the container if required. For example, running docker exec -w /etc/caddy caddy-prod caddy fmt --overwrite will reformat your Caddyfile correctly.
Conclusion
In this write-up I have hopefully conveyed
- How to setup a wildcard DNS in your pihole/dnsmasq server (and why it’s useful for the homelab)
- How to build and use a Docker image for Caddy with the bundled modules
- How to get valid certificates with Caddy and DigitalOcean (or any other provider!), without exposing a single port.
- How to add to and administer your Caddy
Don’t forget to like and subscribe and click the bell icon and checkout my Soundcloud